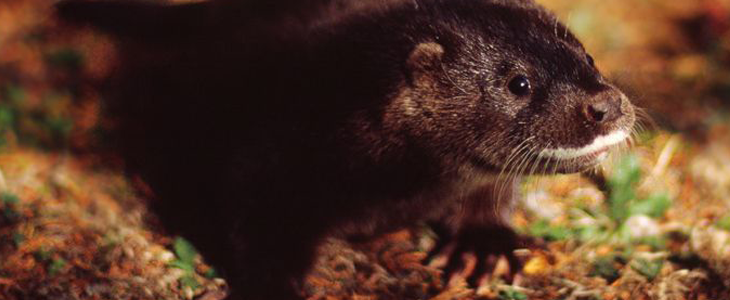
Otter
Lutra lutra - Dobharchú / Madra uisce
Rehabilitation of wildlife casualties requires a licence and a large investment of time and resources. It is mainly in the animal’s best interest to transfer it to an appropriately trained and equipped individual/organisation as soon as possible.
Before attempting to capture a wildlife casualty:
- Observe, assess, discuss, then decide whether intervention is appropriate
- All wild animals can potentially transmit disease and inflict serious injuries
- Remember, your own safety is of paramount importance
HELP NEEDED
- Road traffic casualty (RTA)
- An otter that will allow you to approach it is sick
- Damaged limb/s
- Obvious wounds
- Injured cub
- Otter cub IF it’s on its own, and ONLY after lengthy observation from a distance
- Otter cub if definitely alone and under 1kg in weight
- Trapped or caught e.g. in fence – do NOT cut free and release until fully assessed
- If unresponsive/unconscious – needs veterinary attention immediately
HELP NOT REQUIRED
- ALL APPARENT ORPHANS, (unless injured, in dangerous situation, or definitely alone)
- If you are not equipped
- If you or others would be put in too much danger
IT DOES NEED RESCUING, WHAT NEXT?
FIRST try to call relevant contact number from CONTACT page for further advice
Otters are strong animals with a dangerous bite, do not handle unless confident
WANT TO ATTEMPT CAPTURE
- Follow capture instructions below
- Capture ONLY if you have adequate equipment and container
- Consider personal safety on roads e.g. reflective jackets, warning signs
- Bring to a vet if possible, if not bring home temporarily
- Follow husbandry advice for feeding and housing
- Call relevant contact number from CONTACT page for further advice
DON’T WANT TO ATTEMPT CAPTURE
- If you can approach the animal lay a blanket/coat over the casualty for warmth
- If animal is on the road, protect it from traffic if possible
- Consider personal safety on roads e.g. reflective jackets, warning signs
- Do not drag the animal off the road, if safe to do so, lift it to a safe place on a coat/towel
- (see Unconscious casualty capture)
- Note exact location and call relevant person from CONTACT page
- Ideally stay with the casualty until someone comes to help
Equipment
Blanket, gauntlet type gloves, long handled nets, soft headed broom, dog grasper
Puppy crate or rigid wire mesh container e.g. cat trap/crush cage
Ideally at least 2 people
DOG GRASPER IDEAL CAPTURE METHOD
Dog grasper capture (e.g. under a garden shed)
- Dog grasper slid over the head and one front leg and gently tightened
- Otter pulled into the open
- With container on its side on the ground, otter pulled into container
- Container closed, grasper released and carefully withdrawn WITHOUT letting otter out
Entanglement / entrapment capture (e.g. caught in fencing)
Ideally vet/ rehabilitator can come and assess the otter’s condition in person
If not, assess otter’s condition with vet/rehabilitator over the phone
If decision is made to capture the otter, follow instructions below:
- Dog grasper slid over the head and one front leg and tightened
- DO NOT CUT FREE AND IMMEDIATLY RELEASE!
- Person two cuts fencing
- If, and only if, after discussion with the vet/ rehabilitator, all are satisfied that there has been no serious physical damage to the otter, i.e. no fencing material has become embedded in or put pressure on the animal, then it may be released
- If worried/unsure, treat as for snaring (see below)continue capture (as below) and bring to vet for assessment
- Container must be large enough to fit fox and any embedded fencing section
- Otter pulled/lifted into open container (support rump by scruffing it as you lift)
- Container closed, grasper released and carefully withdrawn WITHOUT letting otter out
Caught in snare
- Dog grasper slid over the head and one front leg and tightened
- DO NOT CUT FREE AND RELEASE! (want to prevent wound damage)
- Person two cuts wire so animal can be rescued, along with any embedded snare section
- Container must be large enough to fit otter and any embedded snare
- Otter pulled/lifted into open container (support rump by scruffing it as you lift)
- Container closed, grasper released and carefully withdrawn WITHOUT letting otter out
Unconscious casualty capture (e.g. hit by car on road)
- If animal lying as if unconscious, poke gently with stick/brush to check for movement
- If no movement, still handle with great care as handling could bring it back to consciousness
- Put towel over head
- Scruff tightly with both hands and lift into open waiting container
OR..
- Put towel over head. With thick gloves roll animal onto blanket, lift and tip into open waiting container
Trap capture (if mobile)
- Choose an area that the otter frequents on a daily basis, ideally with a hidden vantage point so you can check on the trap
- Place the trap here
- Leave food out for the otter every day at the same time
- Initially leave the food at a distance from the trap but over a few days bring it closer to the trap, eventually leaving it inside the trap
- Any type of fresh, human consumption quality whitefish e.g. whiting, will do. Trout can be tried if whitefish continuously untouched
- Remove uneaten food when bringing fresh food
- Check trap at least every 6 hrs
Net capture (if in an enclosed area)
- Person 1 ideally hides in the otter’s anticipated escape route
- Person 2 herds otter in direction of net
- Person 1 ideally slams net to the ground over otter
- Person 2 pins otter’s head to the ground with soft brush (if so equipped)
- Person 1 throws wet towel over otter and with thick gauntlet type gloves, rolls/bundles otter towel and net into container listed above
- Try carefully to remove towel and net from container WITHOUT letting otter out
Box capture (if in an enclosed area)
- Container laid on its side on the ground
- Herd otter into box using high rigid boards/fencing. (otters can leap like a cat to escape)
- throw towel over otter in container
- Pin otter down with soft brush (if so equipped)
- Quickly close container as you withdraw brush
- Remove towel only if it can be done without otter escaping
Capture notes
If casualty is on a road, attempt capture from road side and herd away from road
Consider personal safety on roads: reflective jackets, warning signs etc
Crouch down when approaching – you appear less of a threat
Approach slowly, stopping if animal appears ready to flee
TRANSPORTATION
Sturdy carrier – wire mesh or solid container with secure lid, ideally a mesh crush cage from the vet
Dog carrier/puppy crate
In an emergency, if otter was unconscious, if only short duration of transport, and only temporarily; two rigid plastic fish boxes could be used if tied tightly together
Ventilation
Avoid direct sunlight – danger of overheating
Cover container with towel, darkness will reduce stress
HANDLING
NEVER lift an otter by its tail
Do not handle unnecessarily
Once captured do not try to calm animal by talking to it
Keep other domestic animals out of sight
Otters do not tolerate sedation/anaesthesia well and MUST be actively brought out of the anaesthetic
See SUPPLIERS page for food and equipment mentioned below
Housing
Cage must be large enough for otter to stand up and turn around in
House in quiet area away from domestic animals and children
Darken the container to reduce stress
Bedding can be straw or hay if obtainable, otherwise line container with newspaper
Ideally solid walls! concrete, stone, thick wood, rigid plastic
Suggestions:
- Dog cage/crate from vet
- Building site mortar tub
- Empty deep water tank, with lid
- Empty deep wheelie bin in emergency!
Warmth
Wrap in a warm towels if otter very sick and unable to stand
Place container in warm area inside house
Feeding
Fresh white fish e.g. whiting
Do not use oily fish e.g. mackerel or herring
Heavy bowl of drinking water if animal bright and alert
See SUPPLIERS page for food and equipment mentioned below
Step by Step:
- Weigh
- Warm up
- Stimulate to urinate/defecate
- Provide fluids
Housing – cub
House in a cage or solid wooden box
Use towels on top of newspaper for bedding
Keep indoors, in a quiet darkened place, away from children and domestic animals
Only handle for feeding
If older, heavier, lively and climbing, see housing in Husbandry Adult section above
Warmth
The cub should feel warm to the touch
Warm up slowly with warm towels if very cold
If under 400g, or very sick, the cub needs to be kept warm; part of the container needs to be roughly 30˚C.
A hot water bottle wrapped in a towel can be used
Beware overheating can also kill so give enough space that the cub can move away from the heat
If the cub is cold it will be unwilling to feed
Toileting
Blind cubs need help urinating and defecating
Toilet at regular intervals: 2 hourly initially, moving to longer intervals as dictated by the animal. Before and after each feed gently stroke their genital and anal area with damp soft tissue / cotton wool for about 60 seconds until urine and/or faeces are produced. If the cub’s eyes are open, still toilet him until you are certain he is urinating and defecating by himself before you stop toileting altogether
FEEDING
Rehydration solution/ ‘milk’ suggestions:
- Rehydration solution – “1 pinch of sugar and 1 pinch of salt in 1 cup of warm water”
- Canine milk replacement e.g. Esbilac or Lactol
ALL feeds should be lukewarm
(24hrs of rehydration solution feeds is fine if alternatives are not possible)
Only handle for feeding (for frequency see below)
If a bubble of liquid appears at the nose or the cub starts sneezing or shaking its head, stop feeding immediately and tilt the head down allow any fluid to drain out. Dab with tissue, take a break, and then start again very slowly
Preventative measures:
- Use rehydration solution for the first few feeds while you and the cub get used to feeding
- Hold the cub vertically or lying on its belly whilst feeding
- Always feed patiently, slowly and gently
- Try to get the cub to lick/suck the fluids slowly rather than guzzling
Take to vet for antibiotics and other respiratory drugs if cub inhales fluids and starts coughing for any extended period of time, breathing heavily or breathing with mouth open
Introducing ‘milk’
1st feed – rehydration solution
2nd feed – rehydration solution
3rd feed – ¾ rehydration solution, ¼ milk (formula as above)
4th feed – ½ rehydration solution, ½ milk
5th feed – ¼ rehydration solution, ¾ milk
6th feed – milk
Faeces
Good – soft and dark
On milk formula faeces will be pale yellow/white and curdled looking. This is NORMAL for milk diet
Bad – pale, runny, watery
Seek veterinary attention if unsure or worried
If using milk formula then change back to rehydration fluids for 24hrs
Sterilise all feeding equipment
Once faeces look normal again, slowly reintroduce milk formula
Bottles/equipment
- syringe but be aware of aspiration pneumonia (mentioned above) and feed very slowly watching to check that the cub swallows as you feed
- Esbilac / lactol bottle
Quantity &Frequency (ROUGH guide)
| Weight | Approximate age | Quantity per feed | Frequency |
|---|---|---|---|
| 200 g | 2 weeks | 2.5ml | 8 feeds per day |
| 600 g | 4 weeks | 10ml | 6 feeds per day |
| 1200 g | 7 weeks | 24ml | 5 feeds per day |
Theoretically cubs may be fed up to 10-20% body weight per day, depending on appetite
Table above is ROUGH guide, each individual is different
Never feed an animal so much fluid that its tummy becomes hard and distended
Frequency
If very young, especially if eyes still closed, feed 2-3 hourly, through the day and 4hourly during the night
If older and lively feed every 4hrs during the day, last feed 10pm, first feed 5 or 6am
If they are unwilling to wake up and feed, extend the gap between feeds by ½ hour
EXAMPLE
Assuming you have a 1.5kg otter, roughly 2mths old, crawling around, eyes open
Feed 150-300g per day over 5 feeds, so feed roughly 30-60g per feed
Winding
After feeding, take a few minutes to rub the cub’s back and encourage winding
Hygiene
Keep feeding utensils in a deep bowl of sterilising solution e.g. Milton
Use clean feeding utensils for each feed
After use, dismantle feeding equipment and clean thoroughly in warm soapy water, rinse, then replace in the sterilising bowl
Rinse utensils before each feed
Rehabilitation of wildlife casualties requires a licence and a large investment of time and resources. It is mainly in the animal’s best interest to transfer it to an appropriately trained and equipped individual/organisation as soon as possible.
Before attempting to capture a wildlife casualty:
- Observe, assess, discuss, then decide whether intervention is appropriate
- All wild animals can potentially transmit disease and inflict serious injuries
- Remember, your own safety is of paramount importance
Housing
Extremely destructive, can dig, chewing on cage can damage their teeth and potentially ruin their chance of release
Ideally outdoor run with shelter:
- Solid sides e.g. brick, metal, thick wooden sheets, or vertical metal bars that can’t be chewed or squeezed through, to a height of 1metre then weldmesh fencing above that to head height. Mesh or concrete floor
- Or solid floor, solid sides to at least 1.8m and then a solid inward overhang all around the top
- Fully enclosed horse stable
Box for shelter, ideally wooden or solid plastic, draught free, ideally with angled entry and exit tunnel
Straw or hay for bedding
Fresh water for drinking
Constant access to water is unnecessary initially. After treatment and when fit enough to swim, a rigid container with fresh water can be added to the enclosure
Sufficient area to exercise on land, not too much that re-capture is made impossible
Big leafy branches for hiding, enrichment, and to reduce stress
Located in quiet area away from domestic pets
Feeding
Variety of fresh white fish, e.g. whiting, or if fussy, try trout. Supplement with ‘Fish Eater Tablets’ inserted into the mouth of the fish or crushed and smeared all over the fish
Heavy shallow bowl of drinking water
Hand-rearing should not be undertaken unless:
- IT CAN QUICKLY BE PLACED WITH OTHER CUBS IN A SOCIAL GROUP FOR RELEASE
- (Email <info@irishwildlifematters.ie> if you acquire an orphan, you will be put in touch with other orphan carers)
- The cub will be kept as wild as possible
- Suitable accommodation facilities will be provided
- It is understood that it will require a commitment of about 12-15 months
- It is understood that rearing and successful release of an otter requires considerable expertise, money and specialised pre-release accommodation
Extra info for long term husbandry:
Warmth
If under 400g, or very sick, the cub needs to be kept warm; part of the container needs to be roughly 30˚C
Beware overheating can also kill
Weight
Newborn weight: 100-120g
From 2-10mths of age; monthly weight gain roughly 650g for male, 450g female
Weigh same time each day
Weight loss or static weight is an early indicator of underlying problems
Development in the wild
Birth: eyes closed
2-3 weeks: start crawling
4-5 weeks: eyes open
7 weeks: first solid food eaten, increasing activity levels
8 weeks: permanent molars erupt
12 weeks: swimming
Feeding
Rehydration solution – Lectade or equivalent
Ideally a half and half mixture of ‘Multimilk’ and ‘Milk Matrix 30/55’
Canine milk replacement e.g. Esbilac or Lactol – no additional vitamins needed
Bottles/equipment
- Esbilac/ Lactol bottle
- Royal canin puppy/kitten nursing bottle
Weaning
When able to walk around and teeth have come through
Encourage to drink from bowl, once cub learns, always keep fresh water available
When teeth appear, introduce small pieces of raw white fish
Over the course of several weeks, gradually reduce milk formula and increase fish
Finally feed only fish with added Fish Eater Tablets or multivitamin tablets
Records
Routine records should be maintained of daily weight, times of each feed, quantities of milk consumed, urine/faeces production and general condition/demeanour
Winding
Gripe water, or equivalent, if becomes a problem
Faeces (spraints)
Good – soft and dark
On milk formula, faeces will be pale yellow/white and curdled looking. This is NORMAL for milk diet
Bad – pale, runny, watery
Seek veterinary attention
Withdraw food for 24hrs; give only rehydration fluids (ideally at least 50ml/kg/day)
Sterilise all feeding equipment
Once faeces look normal, slowly reintroduce milk formula
Imprinting
Easily done, potentially prevent release
Always rear more than one of a species together (not doing so will produce abnormal and dangerous behaviour)
Keep away from smells and noises of companion and domestic animals
KEEP HUMAN CONTACT TO ABSOLUTE MINIMUM!
A particular problem associated with otter cubs is penis sucking
Possibly as a comfort behaviour during periods of stress, but it can become a self-mutilation issue
A buster collar will need to be used to prevent access
Concentrated orange oil (from culinary suppliers, i.e. suitable for ingestion) dabbed around the area could be tried first as the taste may prevent further comfort sucking
Must be reapplied regularly
Otters do not tolerate sedation/anaesthesia well and MUST be actively brought out of the anaesthetic
Always seek advice from specialist organisations with knowledge of suitable release sites/habitat
Careful assessment and appropriate health checks should be carried out prior to release, as to the risks of released animals introducing new diseases into the wild population/environment.
Release criteria/considerations
Need to be wild – wary/scared of humans, domestic animals and any other natural predators
Must be physically fit, mentally sound, stable body weight for over 7 days
Can’t be released if underweight, unable to recognise/eat normal diet etc
Must be of an appropriate weight for the age, sex, and time of year for the species
Do not release in winter unless it has sufficient body weight to cope with the cold
Ideally return to original location unless dangerous or unsuitable
Release away from roads, species specific predators, areas where they could cause damage
Consider natural history of the animal and the location of local wild groups of these animals
Release during a period of favourable weather.
Ideally identify animal in some way e.g. microchip/tag, for post release monitoring/identification
Preferred habitat
Inhabit lakes, rivers, streams, marshes, coast line.
Holt is dug in river bank with underwater entrances.
Mainly eat fish but also eat frogs, crayfish, crabs, and other aquatic invertebrates and other small animals and birds.
HARD RELEASE (direct release)
Adults
Hard release technique
The animal is simply allowed to exit a transport container with no further care or feed provision.
Hard release candidates
Hard release technique only suitable if animal rescued as an adult and only if in captivity for short period of time, and only if to be released where originally found.
Release timing
Release adults as soon as possible
Try not to release during winter months
Species specific considerations
Release habitat must have an adequate food supply to accommodate successive groups of otters over several years.
Ensure area not susceptible to pollution problems.
Avoid conflict areas e.g. fish farms/small angling lakes
Investigate acceptance of the release by landowners/fishermen
Within a sub-optimal otter population
Technique
Ideally return to exact location animal was rescued.
Open carrying cage and let animal leave in its own time.
Release at dusk.
SOFT RELEASE (gentle or gradual release)
Cubs (sometimes adults)
Soft release technique
Soft release aims to slowly reintroduce the animal to the wild while still in a comfort zone e.g. cage it was reared in, and allow the animal to leave the cage once confident and independent.
It involves continuing to care for animals at the release site, and aims to compensate for difficulties of newly released animals finding food and shelter in a new environment.
Soft release candidates
Essential release method for hand reared animals.
If more than one young animal in care, if practicable, try to form a release group.
Release group – try to have mixed genders, appropriately matched age group.
Also suitable for adults that have been in care for a long period of time, or animals that cannot be released back to where they were found and so have to establish a new territory.
Release timing
Release spring/summer when cub over 12mths of age.
Species specific considerations
Release habitat must have an adequate food supply to accommodate successive groups of otters over several years.
Ensure area not susceptible to pollution problems.
Avoid conflict areas e.g. fish farms/small angling lakes
Investigate acceptance of the release by landowners/fishermen
Within a sub-optimal otter population
Technique
Temporary cage placed in release location.
Their own familiar sleeping box/artificial holt placed within caged area, cub provided with water and only natural food, at dusk, in the enclosure, for 2-4 weeks.
Animal fed only natural foods it will come across in the wild
Cage opened one evening and left in-situ for animal to come and go until it feels confident enough not to return.
Food provided, decreasing in quantity, until the animal no longer returns
Soft release may take weeks -months.
“The Minister may grant a licence to a person to have in possession, for a reasonable period of time —
- an injured or disabled protected wild animal, or
- one or more than one dependant young of a protected wild animal which is orphaned, with the intention of tending and later releasing such animal or young back into the wild when and only when such animal or young, as the case may be, is no longer injured, disabled or dependant, or
- to retain possession of a protected wild animal, that for reasons of disability or for other reasons deemed reasonable by the Minister, would, if released, be unlikely to survive unaided in the wild.”
*Compulsory licence details at end of document*
Let us not waste time complaining about the excessive bureaucratic legislation covering wildlife today. The intent was to provide protection for wildlife and the data is valuable.
If we don’t want to be legislated upon, or don’t like current legislation, we must offer legislative solutions. Apply for your licences but also email your ideas for a more practicable solution for ‘policing wildlife rehabilitation’ in Ireland, to info@irishwildlifematters.ie
OTTER
Status
Irish Wildlife Act 1976 and Wildlife (Amendment) Act 2000 – protected species
Berne Convention, Appendix 2 – requires strict protection
EU Habitats Directive, Annex 2 and 4 – of European interest, requires strict protection and special conservation areas
SACs – RoI 47, N.I 9
CITES, Appendix 1
Irish Red Data book – Near Threatened
Wildlife (N.I.) Order of 1985 – protected species
Exemptions
None
Safeguards
Full protection
Otters are also protected from accidental harm
Rescue and Rehabilitation
Due to their status as a protected species, a *licence MUST be applied for to the NPWS ‘to possess/retain an injured or disabled wild bird/animal’
Release
Subject to the conditions set out in the licence provided for the possession/retention of a wild bird/animal
Notes
Report suspicious activities or equipment to the NPWS Conservation Ranger (see CONTACTS page)
* For a licence application form for the possession/ retention of a wild animal – click HERE
Wildlife Licence Unit
National Parks and Wildlife Service
Department of Culture, Heritage and the Gaeltacht
90 King Street North
Smithfield
Dublin 7
D07 N7CV
Phone: (064) 662 7300
Email: wildlifelicence@chg.gov.ie
No significant diseases
Various different diseases diagnosed post mortem in individual animals
Otters occasionally suffer from post-capture myopathy
Road Traffic Accident
Clinical Signs – commonly fractures, sometimes ruptured diaphragms, livers or spleens, in-coordination, disorientation, temporary blindness
Diagnosis – examination and radiographs. Especially neck region
Treatment – treat as for shock. Temporary splint and pain relief. Surgery once stabilised
Fractures – mainly cheekbone, pelvis or cervical vertebrae
Leg fracture – Relatively uncommon. External fixation or ideally intermedullary pins may be necessary. Short legs so casts and splints often impossible. Buster collars needed
Pelvic fracture – cage rest, spay female?
Comments – euthanize if amputation required. Remove metalwork before release
Bite wounds
Clinical Signs – heat, swelling, pain, puncture wound or laceration, abscess. Mainly head, feet and around the anus
Diagnosis – clinical signs or culture
Treatment – if abscess; drain and treat as open abscess. Fluids as for shock. Broad spectrum antibiotics. Corticosteroids for endotoxaemia. Regular flushing of wound
Fresh open clean wounds – clip, clean and suture if necessary. Use subcuticular suturing and absorbable suture material
Comments – likely to be infected, possibly septicaemic. Careful consideration of release site; possibly release in different area to where found, with fewer otters
Snare injuries
Clinical Signs – injury to the limb, chipped teeth from chewing at it, underlying tissue damage
Diagnosis – ligature marks, snare attached, history
Treatment –remove snare under GA. Analgesics and antibiotics. Aggressive fluid therapy
Comments – keep for at least 7 days to monitor for pressure necrosis or self mutilation
No significant parasites. Various diagnosed post mortem in individual animals
Ticks or suspected infections can be treated with fenbendazole or ivermectin
Dental disease
Clinical Signs – inflamed, bleeding gums, mouth pain, emaciation, bad breath, drooling
Diagnosis – clinical signs
Treatment – symptomatic
Comments – with all animals, mouth should routinely be checked. Cannot be released if damage results in canines needing removal
Eye problems
Clinical Signs – retinal dysplasia, cataracts, lesions, whitening
Diagnosis – clinical signs
Treatment – symptomatic
Comments – otters rely more on their vibrissae than sight, releasable with only one eye, seen living in the wild, blind in both eyes
Skin infections
Clinical Signs – inflamed, red areas of skin, hair loss
Diagnosis – clinical signs
Treatment – metronidazole for anaerobes. Additional antibiotics in chronic cases
Comments – common
Hydrocephalus
Clinical Signs – rounded cranium, in coordination
Diagnosis – clinical signs, radiography
Treatment – none
Comments – in cubs, euthanasia recommended
Hypothermia
Clinical Signs – lethargy, temperature below 37.5˚C
Diagnosis – abnormally low temperature
Treatment – warm up slowly and monitor carefully to prevent hyperthermia
Comments – common due to inactivity if ill/injured. No layer of fat
Orphan
Clinical Signs – do not normally leave the holt until after 8wks of age, should be over 1kg at this age
Diagnosis – alone above ground weighing less than 1kg
Treatment – see husbandry section for cub above
Comments – cubs born all year round, mainly summer
Candidates
- No quality of life when recovered
- Amputation necessary
- Hydrocephalus
- If all canine teeth need removing
Drug
- Pentobarbital sodium
Technique
- Deep sedation then IP injection
| SC | between shoulder blades |
| IM | quadriceps or lumbar |
| IO | |
| IP | posterior to umbilicus, needle angled cranially |
| IV | jugular, cephalic |
| PO | in food |
| Temperature (°C) | 37 |
| Pulse rate (beats per minute) | |
| Respiratory rate (breaths per minute) |
Care with hygiene handling all wildlife
Ideally observe discreetly before examination; wildlife hide injuries
Sedation sometimes the only way of ex`amining adult otters, use crush cage if necessary
Slip broom into cage to pin head before scruffing with BOTH hands
Always muzzle when handling, even after sedation or if otter appears to be unconscious
Muzzling difficult due to short snout, temporary tape muzzle more appropriate
Sharp front claws must be restrained
Try not to change grip when handling
Admission procedures
- Weigh
- Warm up
- If baby otter; stimulate to urinate/defecate
- Fluids
- Drugs
RTA casualties will often be suffering volume related shock, treat as below
Treatment for shock
- Warmth (stop animal loosing heat, warm slowly)
- IV fluids – Hartmann’s or Haemaccel (keep muzzle on to prevent chewing IV line)
- Oxygen as required
- Analgesia (if head trauma do not use buprenorphine , finadyne or carprofen)
Steroids (ONLY if CNS trauma e.g. ‘Solu medrone V’ or dexamethasone)
Antibiotics if appropriate
After treatment for shock, attend to conditions that are life threatening or could worsen over 24hrs
Assess every few hours. As soon as stable, examine thoroughly, and decide on a treatment plan or euthanise as appropriate
Reverse or flush anaesthetics out of their system ASAP
Otters ‘come to’ very quickly after reversal
Medetomidine/ketamine, supplemented with isolfurane if necessary, reversed with atipamazole